Openbsd /
OpenBSD Install Guide
This is a quick install guide for OpenBSD 6.8 on BuyVM.
Use your web browser to go to https://manage.buyvm.net. Use the username and password that was given you.
- Click on the [Power State] button, then [Power Off] the server. Any time new changes to hardware apply (upgrading RAM, CPUs, patches), you must hard power off and then boot the VPS. WARNING: Make sure notify your users in advance, then power off your server by running
$ doas shutdown -p now-- or else you may lose data!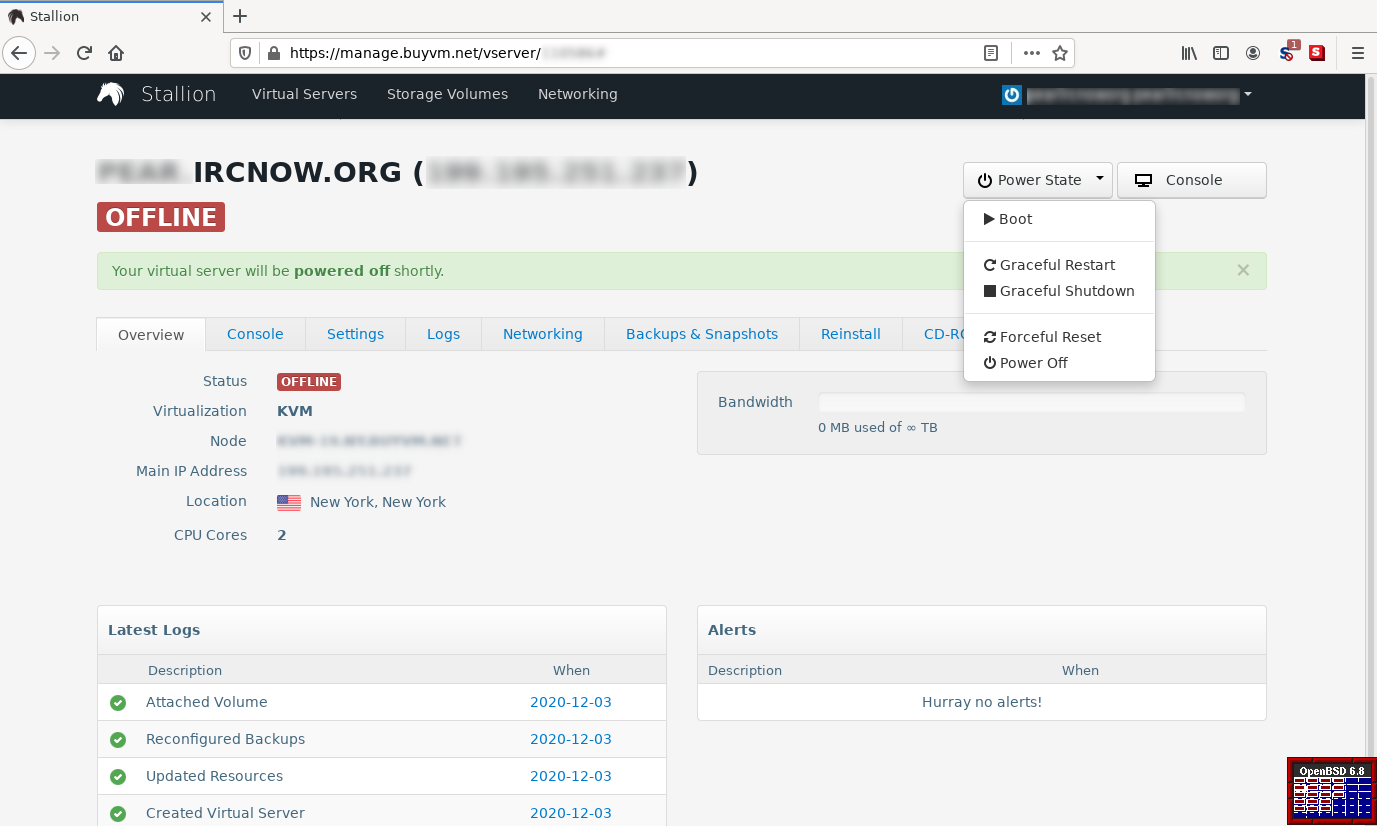
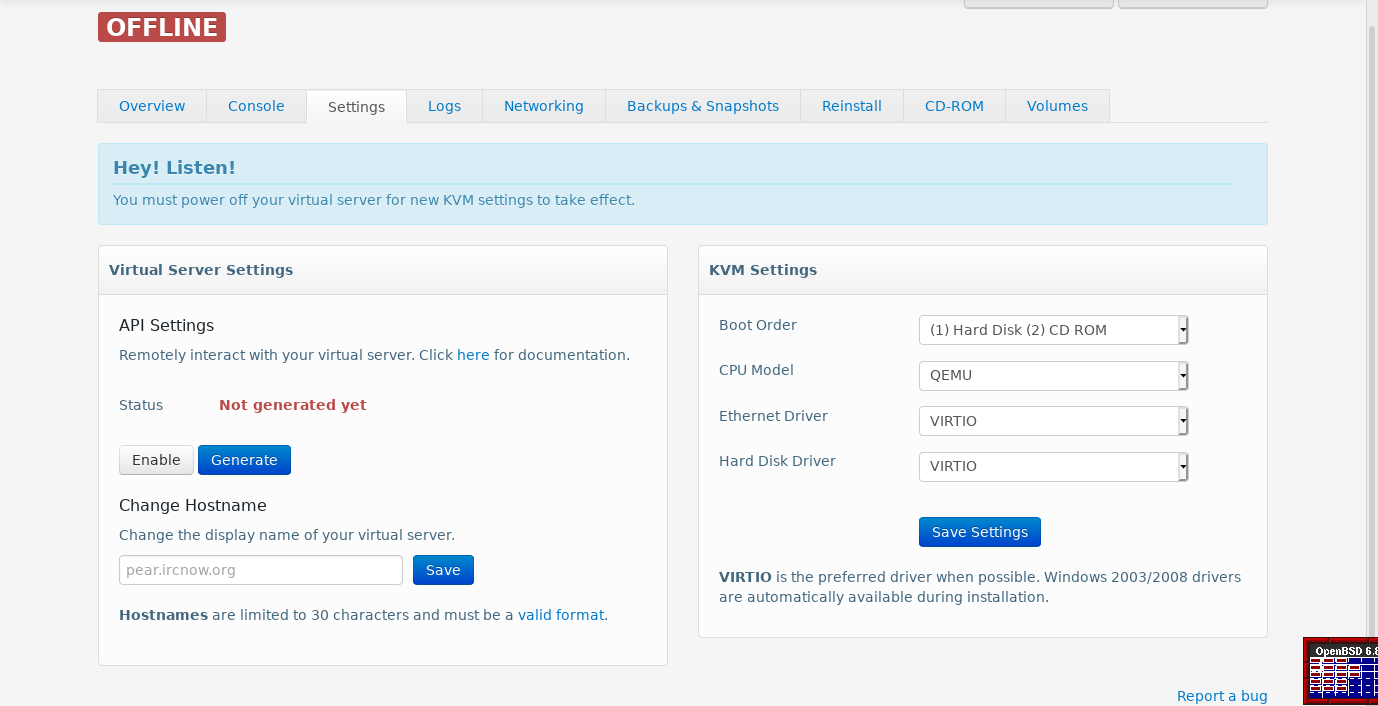
- Click on Settings.
- Click on Enable for API settings, then click Generate. Make sure to copy these values down for use for botnow. They will allow you to configure rDNS records automatically using scripts.
- Make sure the hostname matches what you want. It should probably be
<fruit>.ircnow.org. Click Save. - In the KVM settings on the right, change the CPU model to QEMU, Ethernet Driver to VIRTIO, and Hard Disk Driver to VIRTIO. I suspect this hardware to be most stable (but I am not sure).
- Make sure to click on Save Settings.
- Click on Networking.
- For IPv4, change the main IP address to use your DDoS filtered IP address. Make sure to save changes. Do not share your non-DDoS filtered IP address with non-teammates! If you do, you can get DDoSed and forced offline. You will have two IPs -- the DDoS filtered IP is what you share with the public, the internal IP can be used as a backdoor to log in.
- Make sure the Status is set to On for each IP address you have. Configure the rDNS records. Save Changes. NOTE: In order for rDNS to apply, you must have properly configured A/AAAA DNS records. Please read up on vhosts.

- Click on IPv6
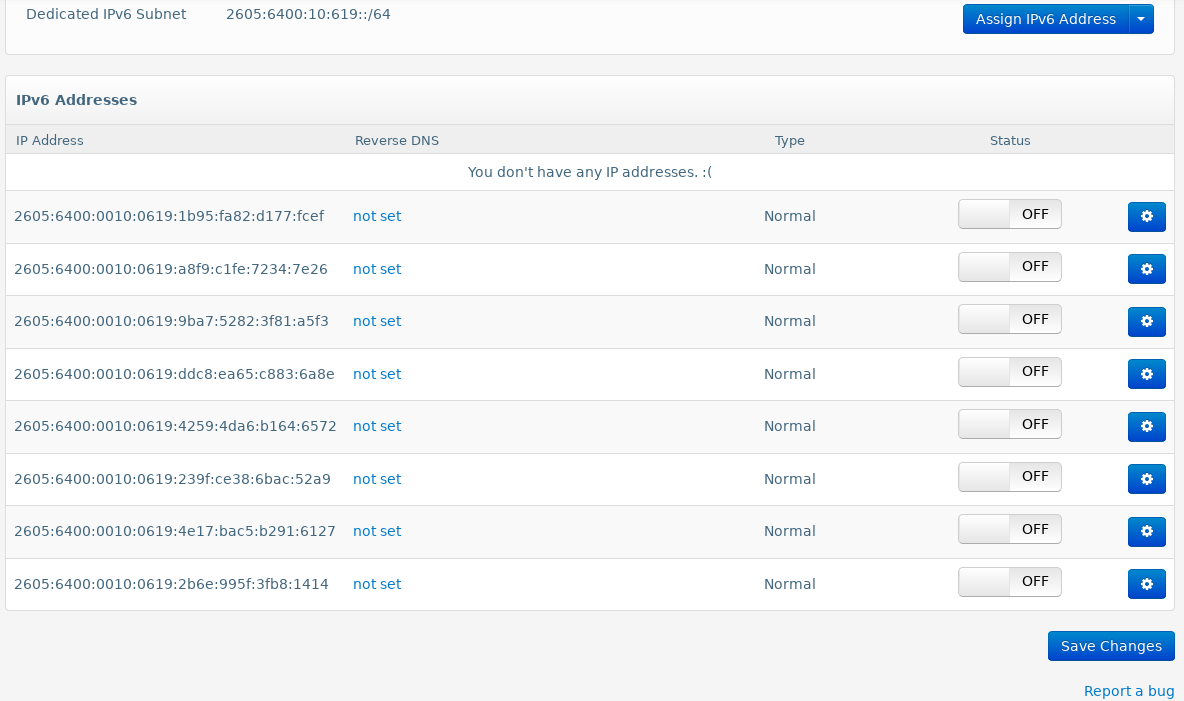
- To use IPv6, you must assign IPv6 addresses from the dedicated IPv6 subnet. Click on Assign IPv6 Address, then Assign Multiple IPv6 Addresses.
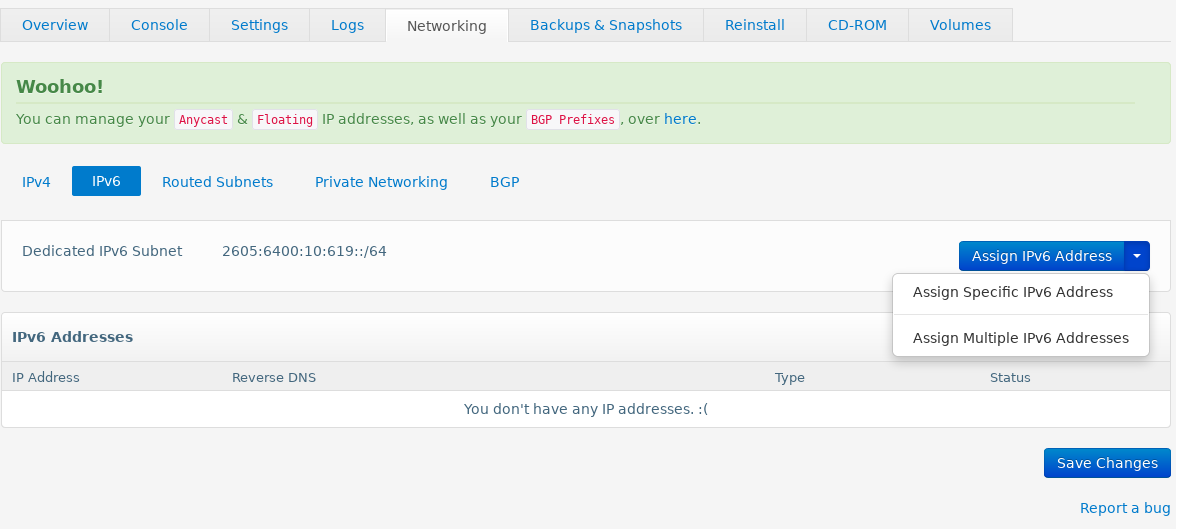
- To use IPv6, you must assign IPv6 addresses from the dedicated IPv6 subnet. Click on Assign IPv6 Address, then Assign Multiple IPv6 Addresses.
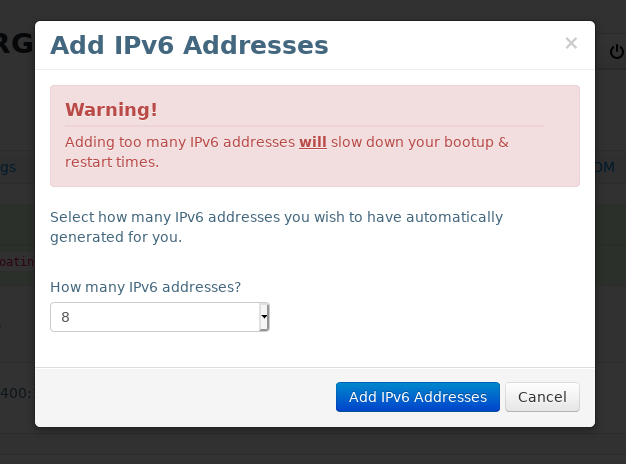
- You can add hundreds of IPv6 addresses, but you must add them 8 at a time. Click Add IPv6 Addresses.
- Configure the IPv6 addresses:
- Click on the Status buttons and set each IPv6 address to On.
- Click on the spinning gear icon to configure rDNS or to delete the IP address.
- Remember: Click Save Changes to apply.
- To use these IP addresses, see configuring static networking on OpenBSD. You will need to record the information about the IP addresses, the subnet, and the default gateway.
- Click on Routed Subnets
- This will enable you to get a /48 subnet without needing to manually enter IP addresses. You will also be given delegation for the rDNS entries.
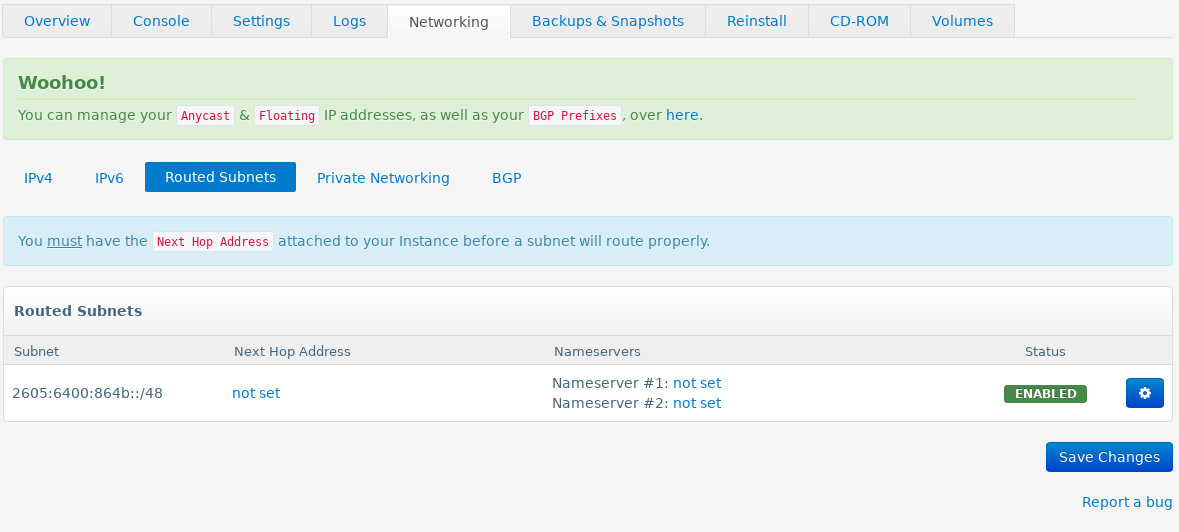
- This will enable you to get a /48 subnet without needing to manually enter IP addresses. You will also be given delegation for the rDNS entries.
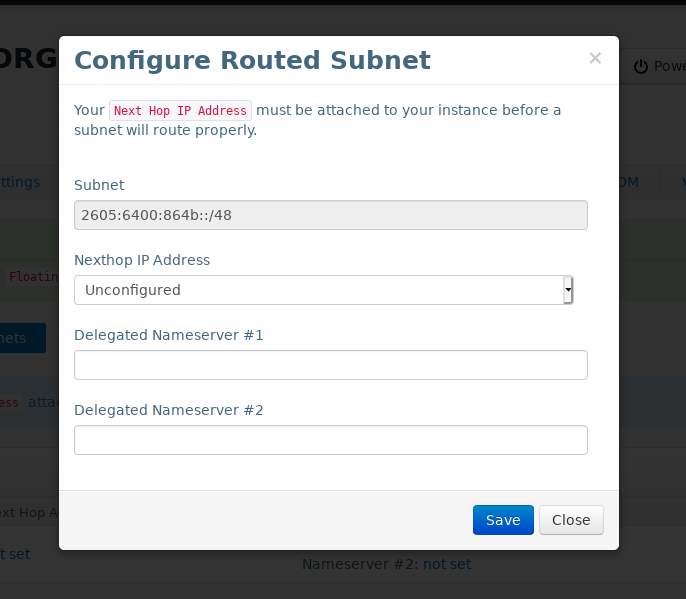
- Configure the name servers
- Set the nexthop IP address to one of your IPv6 addresses
- Set the delegated nameservers to two of your rDNS nameservers.
- Click on CD-ROM
- Search for OpenBSD (at the very bottom), then click Mount ISO.

- Search for OpenBSD (at the very bottom), then click Mount ISO.
- Alternatively, to get a more recent ISO, while inside CD-ROM, click on Upload ISO.
- Upload your ISO.

- Upload your ISO.
- Click on Volumes
- Click on the gear icon to Attach To Virtual Server. Make note of the hard disk size so you can partition and format it later.

- Click on the gear icon to Attach To Virtual Server. Make note of the hard disk size so you can partition and format it later.
- Click on Power State at the top right, then Boot. Then, click on Console.

- Begin installation
- Error 1: If you see "No bootable device", double check to make sure you have mounted the CD-ROM ISO.
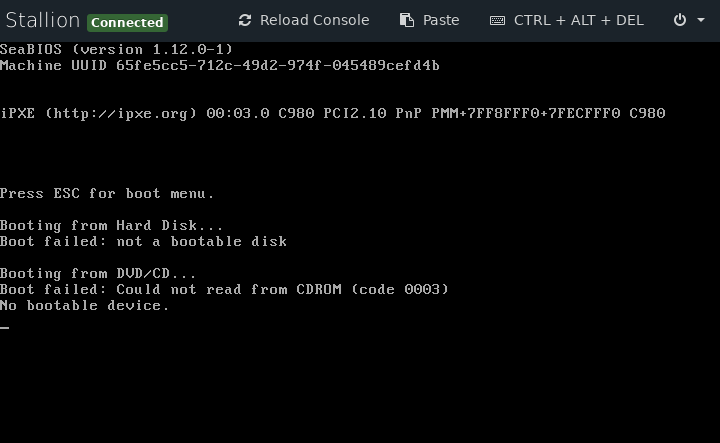
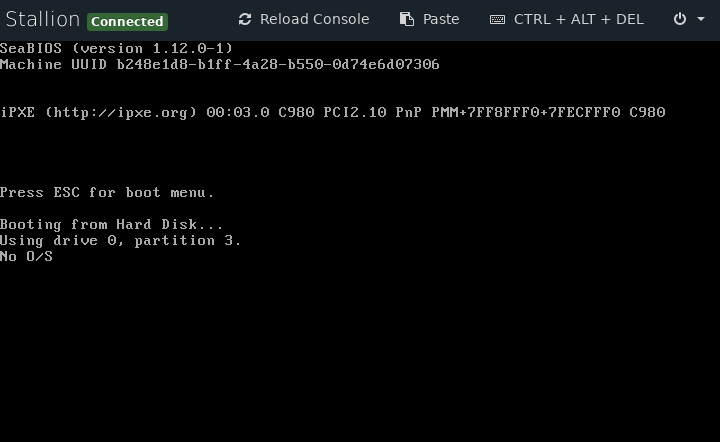
- Error 2: No O/S. This happens when you are booting from hard disk first (before the CD-ROM ISO can be booted from), and the hard disk doesn't contain an OS. You need to go to Settings, then change the Boot Order to (1) CD-ROM (2) Hard Disk, hard Power off the VPS, then Boot it.
- Error 3: The operating system has booted from hard disk instead of the ISO. In this case, you will want to log in and reboot using $
doas shutdown -r now. Rebooting using software will avoid damaging your files. Do not useCTRL+ALT+DEL,Graceful Restart,Graceful Shutdown,Reset, orPower Offunless absolutely necessary, because this will result in data corruption.
- Error 1: If you see "No bootable device", double check to make sure you have mounted the CD-ROM ISO.
- Follow the install instructions.
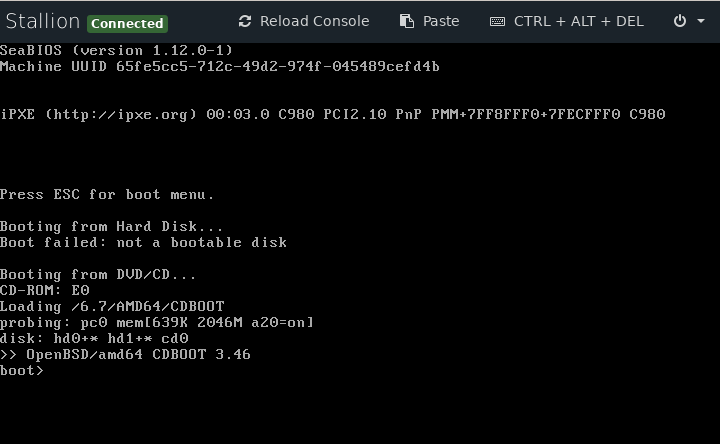
- After installation, go to the web panel and click on Settings. Change the Boot Order to either Hard Disk Only (better) or (1) Hard Disk (2) CD-ROM.
